 Agent Guide
Quick Start
Install the desktop client, sign in, add plugins, employees, and Skills, then complete your first task.
Before you follow the steps, read Introduction to learn what DrowUp Agent is, and what plugins, employees, and Skills are.
This page is the first-run path. Finish one task you can verify, then add more from the markets. After install and sign-in, start with First conversation, then finish listing in Start your first listing task.
Before you begin
You will need:
- A Windows computer (the desktop client is currently available for Windows x64)
- A DrowUp account (the same account works on the web and in the desktop client)
Some capabilities require the desktop client to stay running, including automated tasks. If you use fingerprint environments, keep the client running as well.
The full path
| Step | Action | Done when |
|---|---|---|
| 1 | Download and install the desktop client | The client launches normally |
| 2 | Sign in with your DrowUp account | The sidebar shows a signed-in state |
| 3 | Install the plugins this run needs | Installed plugins show as available in the plugin center |
| 4 | Install an employee from the employee market | The employee appears in your installed list |
| 5 | Install the Skill this task needs | The Skill appears in your installed list |
| 6 | Create a session and run your first task | You can verify a clear result |
Start small
For your first run, install one employee and one Skill, then complete one task that is easy to verify. Add more plugins and parallel work only after the flow works.
1. Download and install
Download the Windows desktop client from the official site and complete installation.
Choose Download for Windows, then run the installer.
Screenshot: the download entry on the site and the client home screen after installation.
Launch DrowUp Agent. Plugin installation, employee selection, and task execution all happen in the desktop client.
2. Sign in
Sign in with your DrowUp account. The web and desktop clients share one account. You do not need a separate registration.
Screenshot: the client sign-in screen and the account area at the bottom of the sidebar after sign-in.
After sign-in, the plugin market, employee market, Skill market, and credits features become available.
3. Install plugins
Open the plugin market from the sidebar and install only what this run needs. Browse the current list and the card descriptions. You do not have to install everything in the market.
A fingerprint environment is optional. Use it when you manage multiple stores or need account isolation. Other capabilities you already use can also be installed from the market as needed.
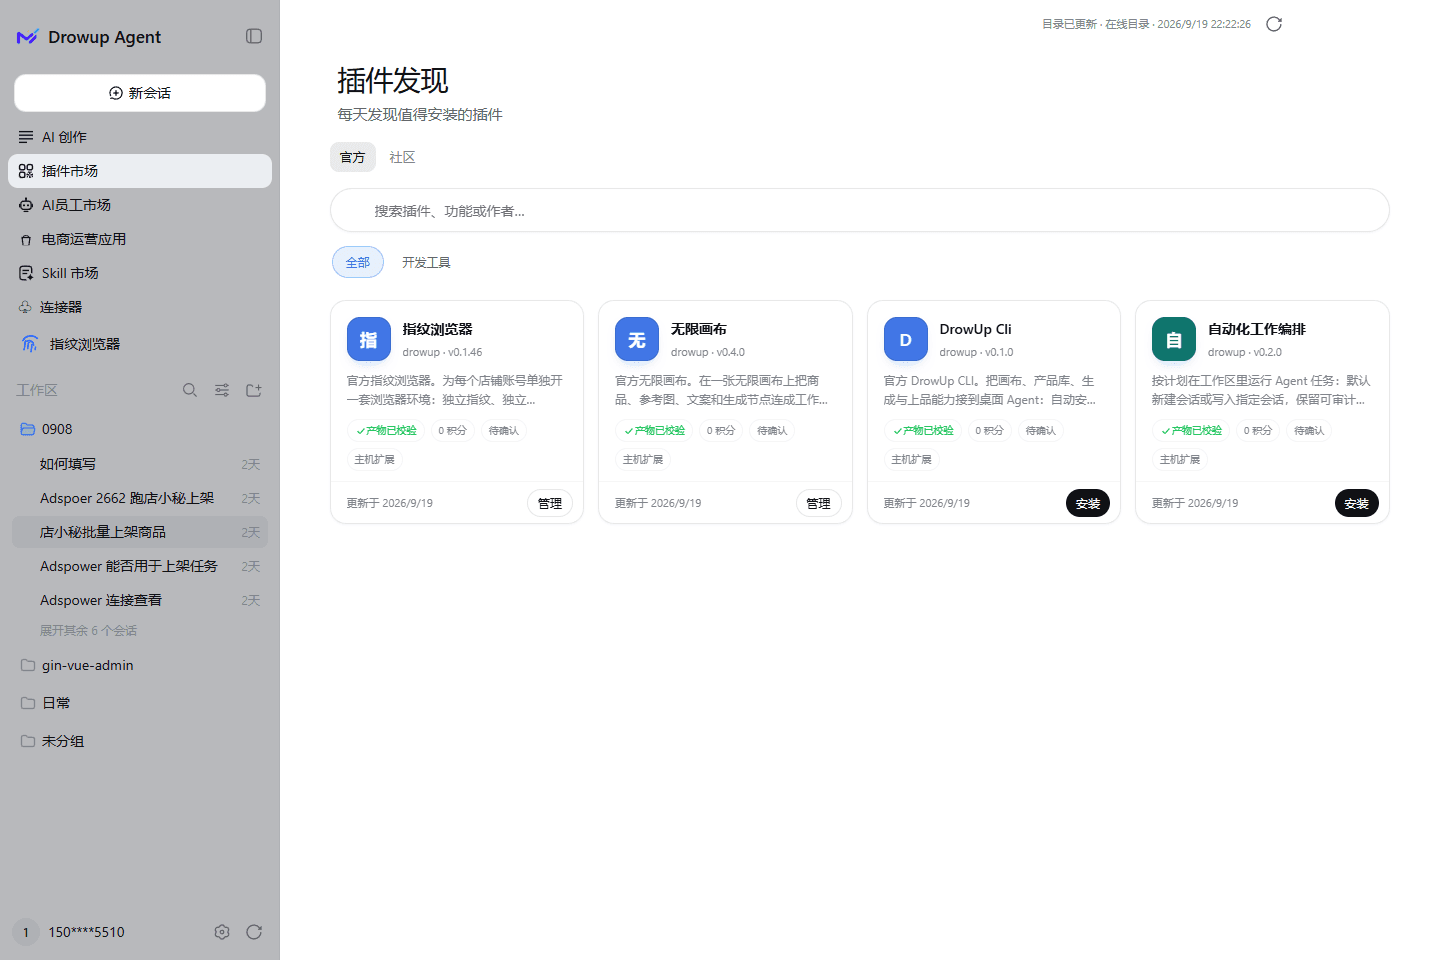
Review the description, version, and permission requirements before installing. After installation, confirm the plugin is available in the plugin center.
4. Install an employee
Open the employee market from the sidebar and install an employee that matches the job you want to do this time. The roles available are whatever the market currently lists.
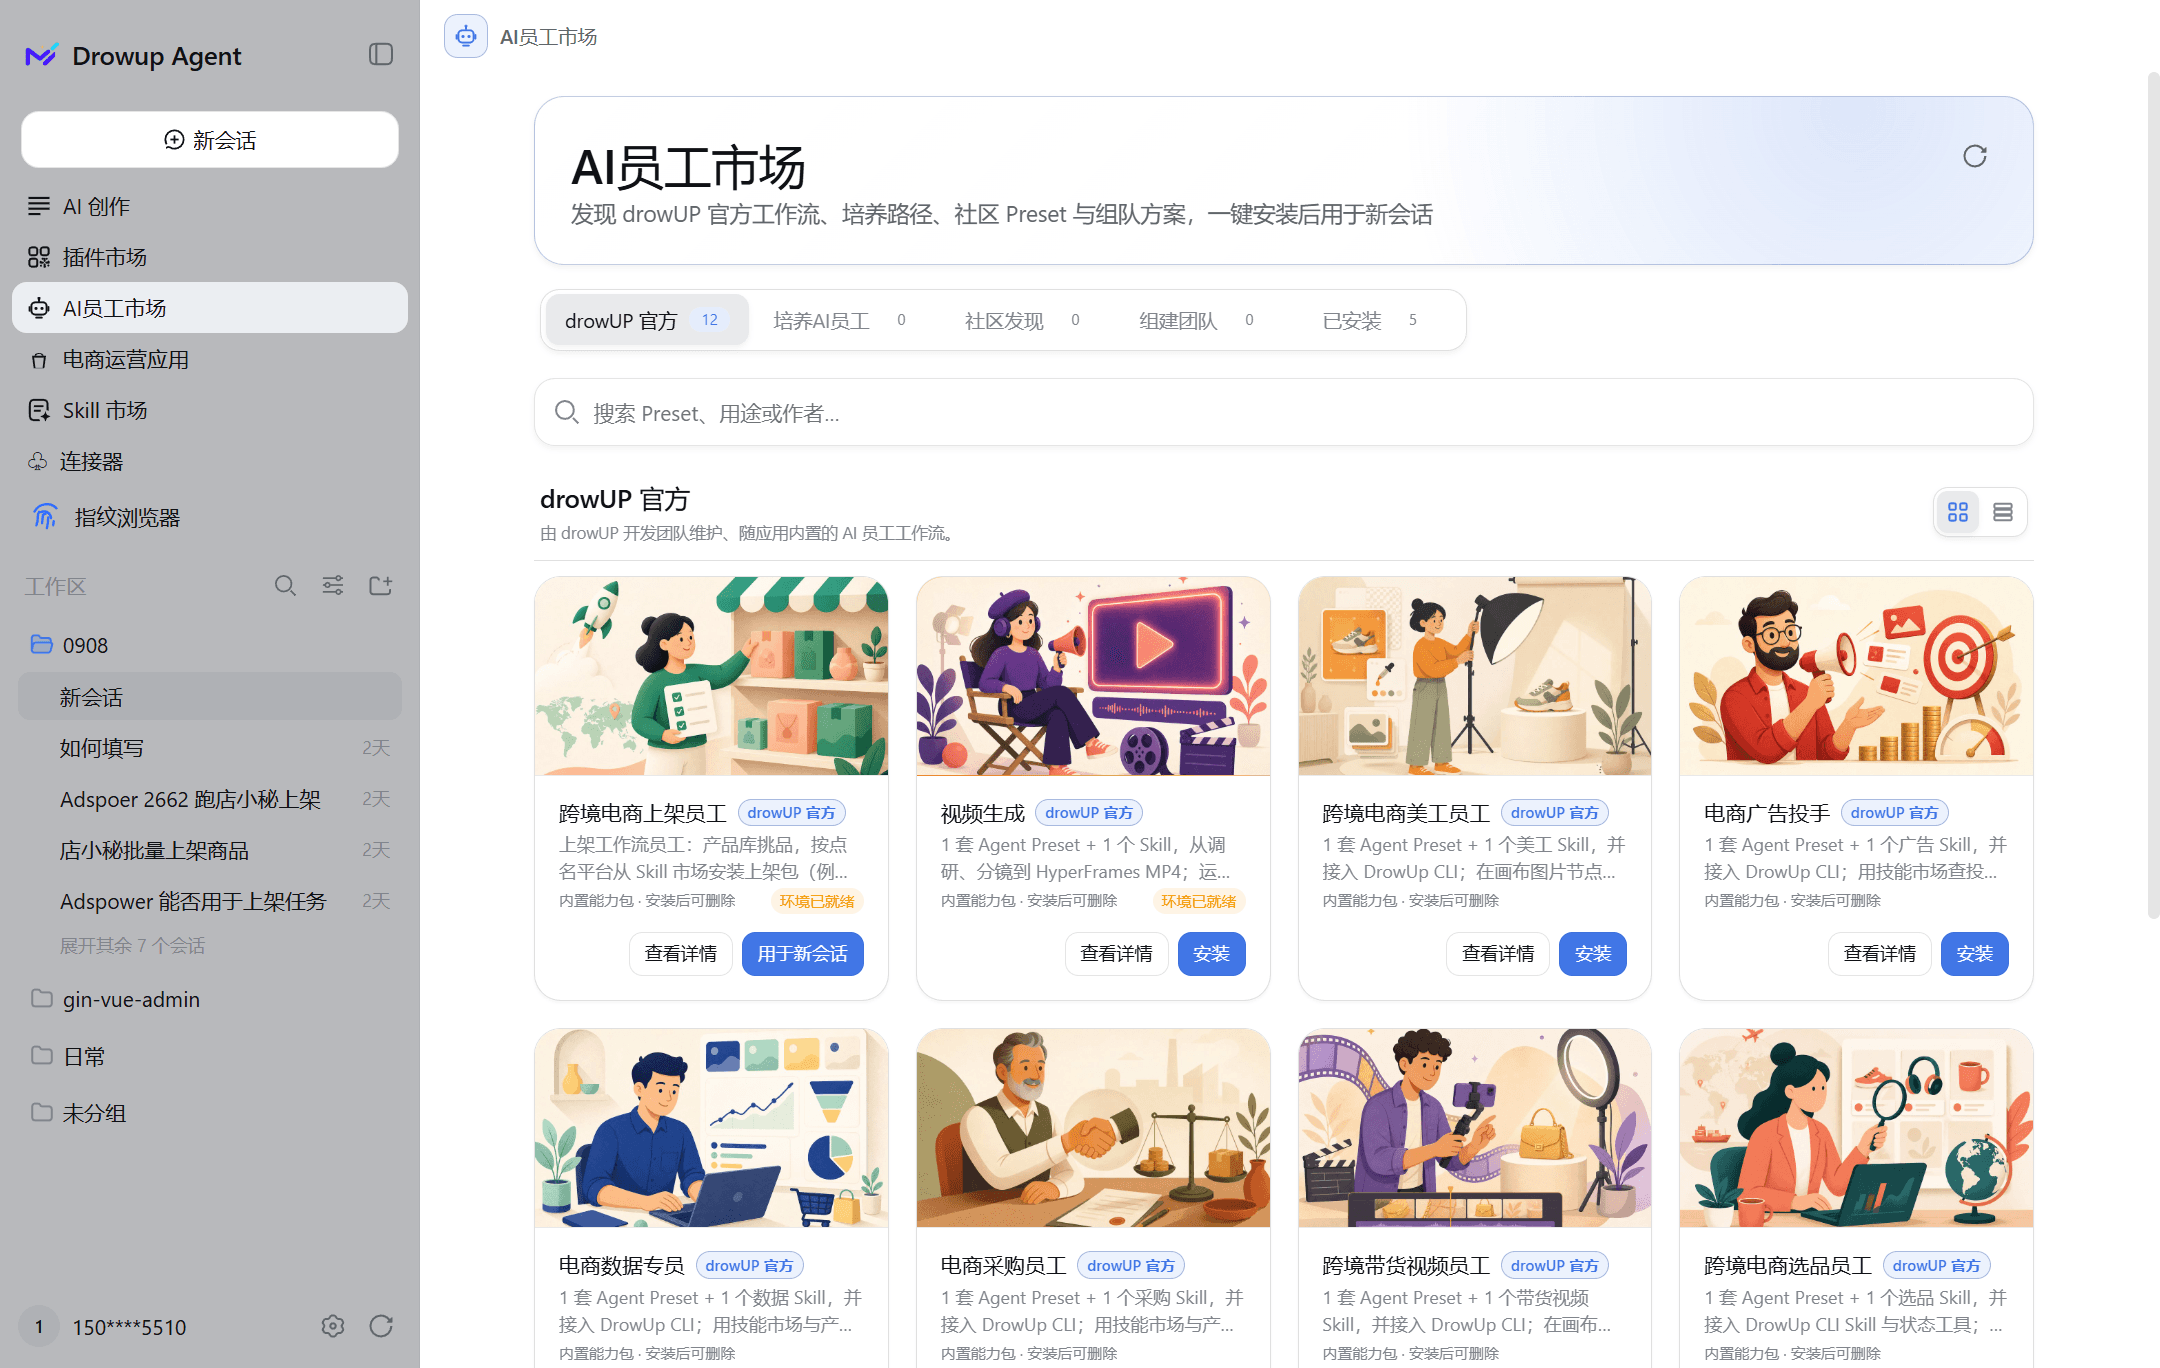
Each employee maps to a job. After installation, find it under Installed and use it to start a new session.
If the employee card shows runtime requirements as not ready, complete sign-in, plugin installation, or environment setup as prompted before continuing.
5. Install a Skill
Open the Skill market from the sidebar and install a Skill related to the current task. Categories update over time; pick by your platform and the work you need done.
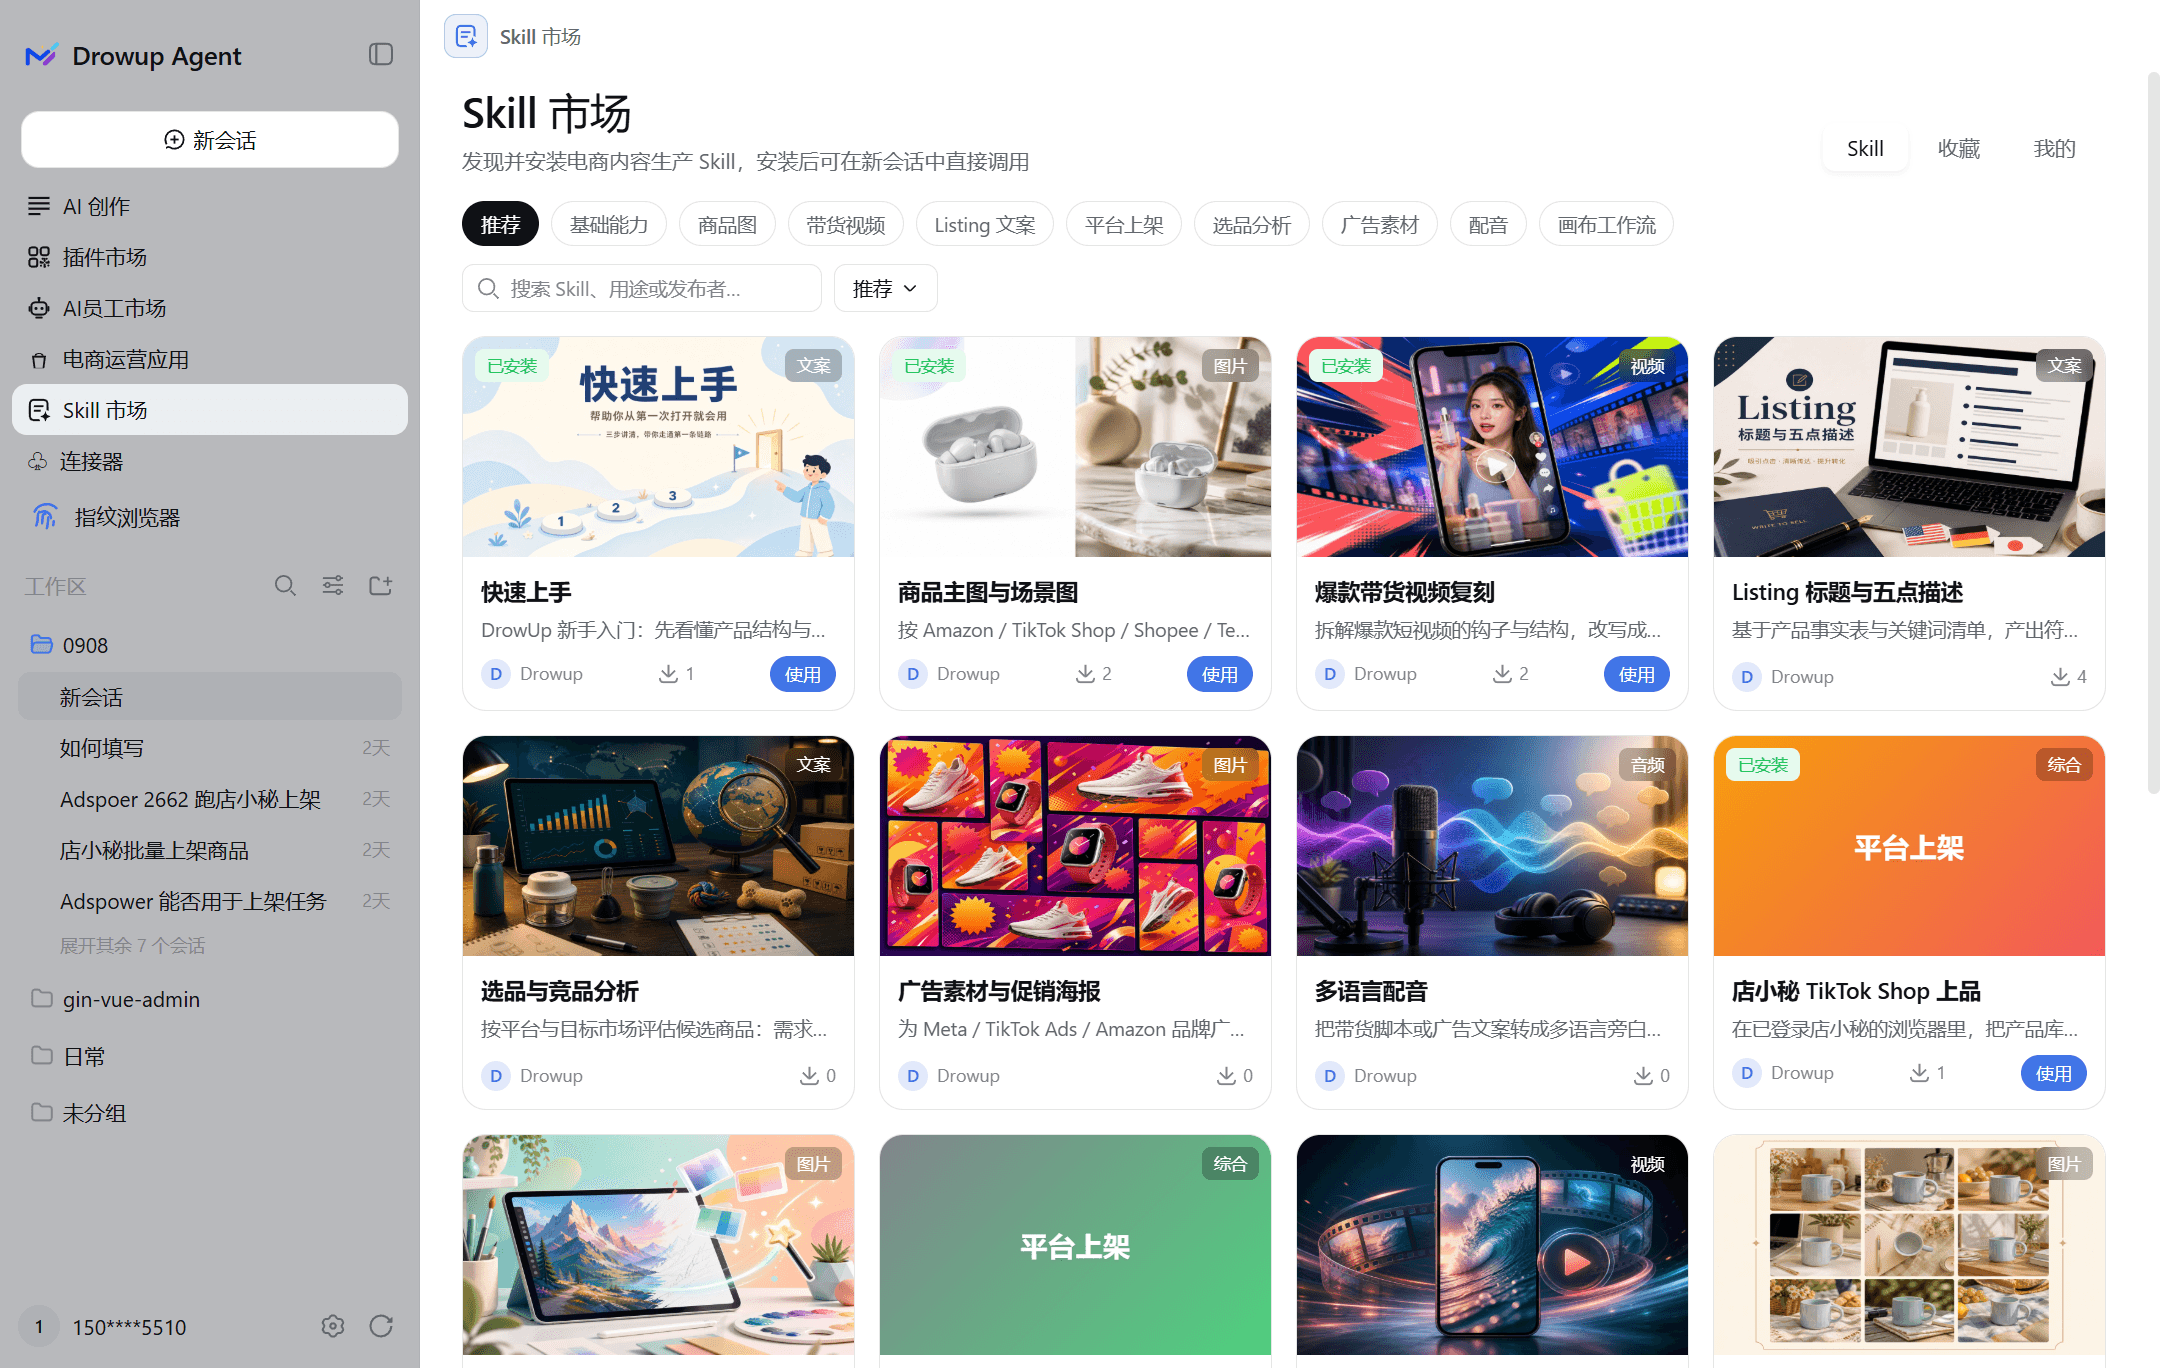
A Skill can be installed for the whole workspace or for one employee. Role-specific flows usually go on the matching employee. After installation, that employee can call it in a session.
6. Run your first task
For store listing, follow Start your first listing task. For other work, start a new session with an installed employee:
- Start a new session with an installed employee.
- Describe the goal in the conversation — for example list a product, check orders, or generate a product image.
- Confirm key details when the employee asks (target store, product, whether to submit).
- Wait for execution and verify the result in the seller backend or run history.
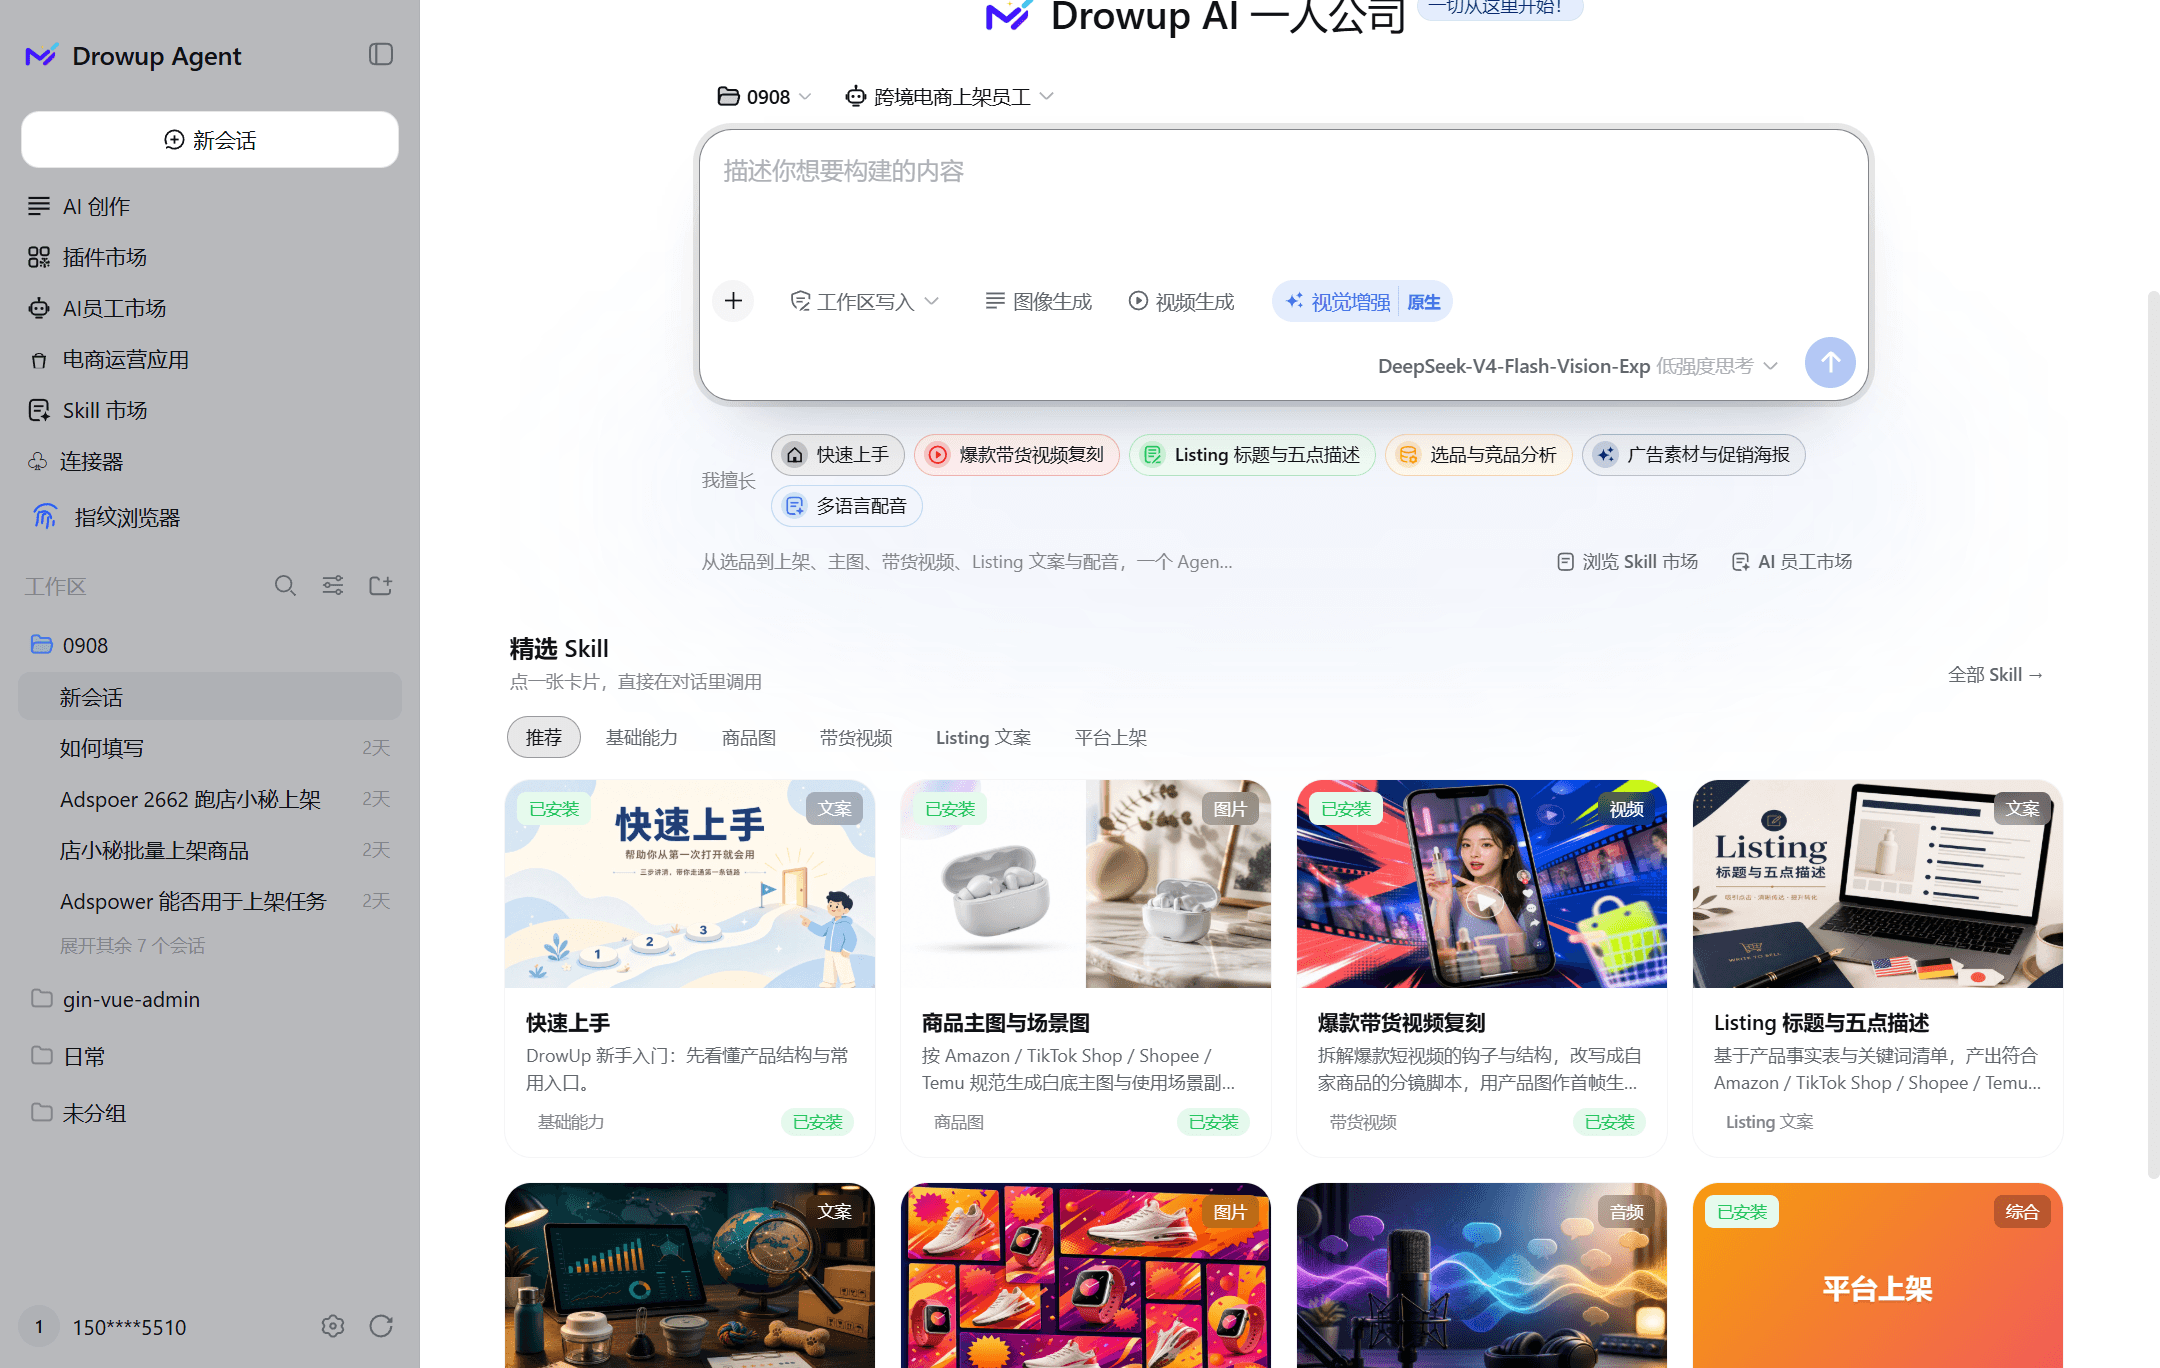
How tasks run
After you send a task, the employee follows the installed Skill step by step. Clear steps run as a flow. When something needs a judgment or more information, the employee asks you or calls a model. Check the result in the seller backend or run history.
Completion check
After your first run, confirm:
- The desktop client is installed and running
- Your account is signed in and team or credit status looks correct
- The plugins, employee, and Skills this task needs are installed
- The first task result can be verified in the seller backend or run history
If a step fails, check employee prompts, run history, or environment logs first, then adjust plugins, Skills, or store login state as needed.